Managing Proxies
Open your web browser to http://www.andrews.edu/go/manageproxies
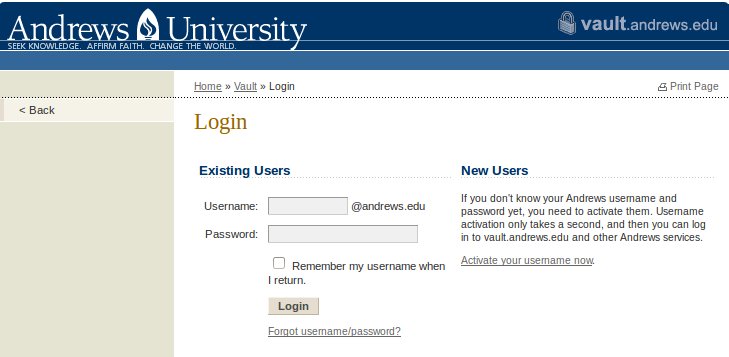
Step 1 Login
Log in using your Andrews University username and password and then click on the "Login" button as shown in the image below
Step 2 Add Proxy
Click on the link "Add Proxy" as shown in the image below.

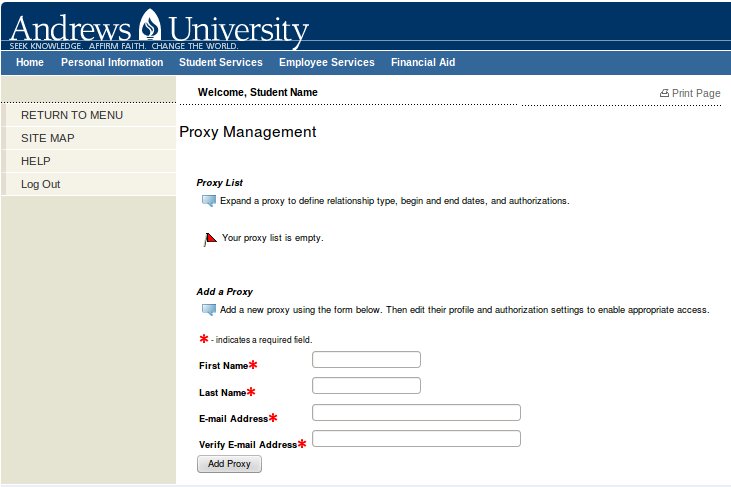
Step 3 Enter Proxy Information
Enter the proxy first name, last name, and email address and then click on the "Add Proxy" button as shown in the image below.
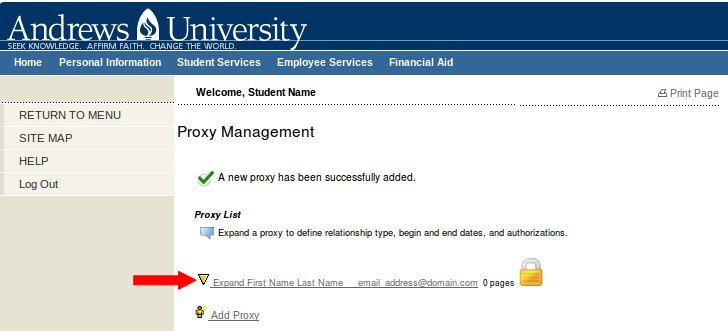
Step 4 Click on the Expand Link
Click on the "Expand" link as shown in the image below.
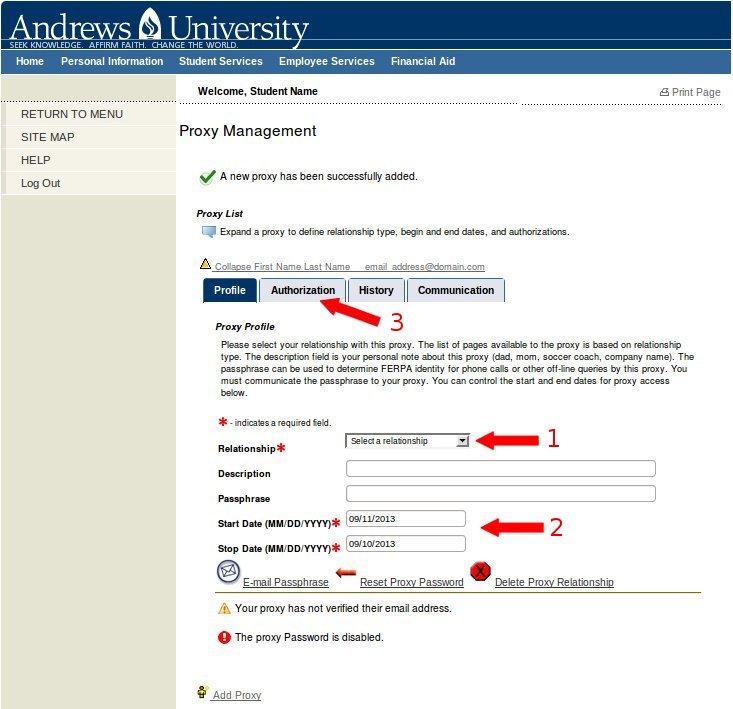
Step 5 Set up the Proxy Profile
Complete these 3 steps
- Select the type of relationship you have with the proxy you are creating.
- Input the start and stop dates that this proxy should have access.
- Click on the "Authorization" tab.
as shown in the image below.
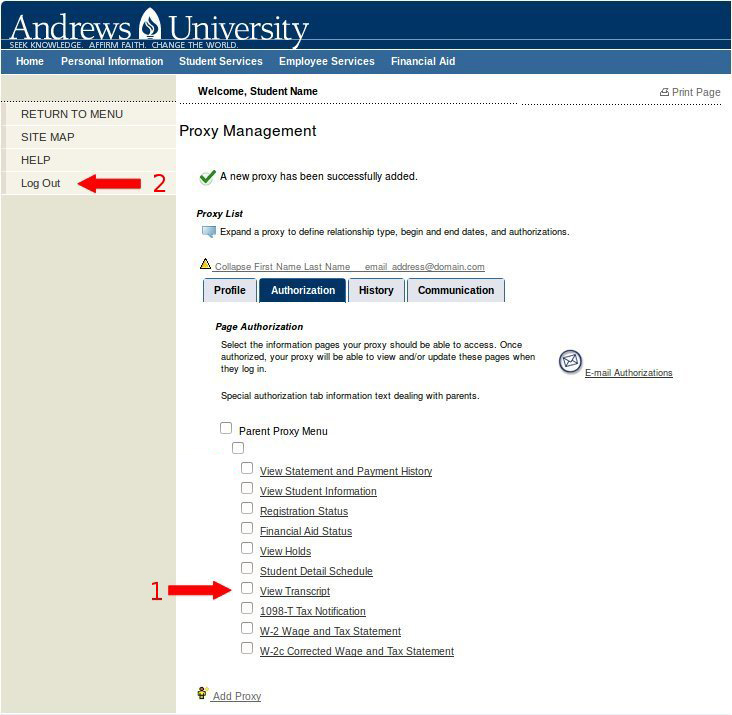
Step 6 Authorization
- Select one or more items to grant to your proxy by clicking on the checkboxes.
- Click on the "Log Out" link.
as shown in the image below.